Stamp foundation with your own hands step by step. Install the column foundation with your own hands - tips and calculations. How to install a column foundation
The foundation is an essential element of any structure: from a light garden arbor to the capital high-rise country mansion. This is the beginning of the construction and its base literally. From how correctly it is chosen, the foundation is designed and completed, the strength, durability and safety of the building of the building depends. The question is which type of foundation to choose, it occurs at the construction planning stage. Its optimal solution in many cases will be the decision to build a column foundation with your own hands: a step-by-step instruction of the work can give a complete idea of \u200b\u200bthe principles of its design and the intricacies of the arrangement process.

Advantages and disadvantages of a column foundation
Calculated independently and equipped with their own hands the columnar foundations for frame houses and buildings without basement premises that do not have strong pressure on the soil, easy to perform and relative to the cheap.

According to reviews, the supporting foundations have a sufficiently impressive list of advantages:

At the same time, the deficiencies in the column foundations are only two:
Types of columnar foundation
Before proceeding with a detailed design and calculation of a columnar foundation, it should be declared on what type of what type and for what technology it will be built on it. From these factors, the choice of material of the base base bases and the depth of their embedding are depends on.

Foundation Materials
For foundation grounds, the following materials can be used:
- reinforced concrete;
- boost;
- blocks;
- brick;
- a natural stone;
- wood;
- pipes: asbestos or plastic.

Depth of the Boundage of Foundation
The depth of the bonding foundation is determined by its design, the technological parameters of the structure and the geological characteristics of the soil in the stain of the building.
In the depth of the embezzlement, the columnar bases are divided into three main types:

For a device of a column foundation with its own hands, step-by-step instructions are needed as the most detailed and visual allowance.
In the general case, the design of the supporting basement is the system of supports of the minimum possible cross section located at the point of focusing of the load: in the corners of the building, in the places of the intersection of walls, under the beams, seals, under the furnace. To determine the number of separate columns, the distance between them is accepted with 1.5-2.5 m. To bind the supports of the foundation into a single design, Rollock is made between them.

The height of the pillars above the zero mark is individual and depends on the structural features of the framework.
Calculation of columnar foundation
The construction of a column foundation begins with the calculation. Most likely, the "Fundam" type program will need for independent execution of the calculations or any other that can be found on the Internet and free download. The following parameters will be needed to work with such programs:

The construction technology of the foundation with columnar supports also requires additional data:
As a result of the calculations made, the following values \u200b\u200brequired for the Foundation device will be obtained:

Stilled unlightened foundation
A columns undelated foundation on the supports located in 1.5-2.5 m increments are used quite often. Such foundations can be erected on non-empty and weakly soils, despite the fact that the construction (wooden or panel house, bath, hozblock, an extension or summer kitchen) has a small area and, accordingly, a small weight. Moreover, if the construction is carried out on the rocky, large-grade or not inclined to fit the ground, this type of foundation can be arranged and under a large area of \u200b\u200ba house from a log or timber. It is also possible to build the foundation on unheardly supports, subject to decreasing the influence of powered forces on the structure. For this, the soil is replaced with a sandy pillow under support.

As a material for columns, the use of concrete, booton, sandbetone or concrete blocks for the foundation, the sizes and prices of which are very diverse are possible. However, most often take the foundation blocks with dimensions of 20x20x40. The price of such a foundation, as well as the number of units necessary for its construction, can be calculated independently or with the help of a "foundation" online calculator. You can also make a column foundation from bricks with your own hands, but it is necessary to take into account that it is unacceptable to use silicate or ceramic bricks with low frost resistance.

Work on the construction of an unburned bar foundation from finished blocks can be divided into several main steps:

When applying the foundation from the blocks of 20x20x40, video clips and step-by-step instructions will help you understand the technology of work, to delve into the process and more accurately assess financial costs.

Fine-breeded column foundation
Fine-breeded foundation is one of the most popular types of columnar foundation. Funds and efforts that require its device are minimal, and the range of application for construction of a frame type is very wide.
As the basis for a skeleton house or a light bath, a column foundation is often made using pipes as a formwork for a concrete mix. Since the entire load will take the reinforced concrete pole, the pipe material does not matter: they are also plastic, and asbestos pipes used usually for the device of sewage networks.
The pipe diameter depends on the load. For light buildings of the type of arbors or attachments, 10 cm is enough, for buildings from the logs, pipes 25-30 cm are needed. The amount of concrete is eventually determined by the pipe diameter. 10 m pipe 10 cm in diameter will need 0.1 m3 of concrete, the pipe 20 cm will require a 0.5 cubic meter, 30 cm - 1 cubic meter. Calculation is made taking into account the concrete cushion base.

The scheme for holding work on the device of a column foundation from asbestos pipes with their own hands (the video process can be found on the Internet) in general, the following:
- preparation of the construction site - garbage cleaning, removal of foreign objects, removal of the jam and alignment. Marking of the perimeter of the future building, corners, inner walls and their intersections. Installation sites of the basement of the foundation are marked by pegs;
- then the manual brown for pillars make holes in the ground. The depth of the well should be 20 cm more calculated: for the device of a sand pillow;
- the device of a sand pillow with a mandatory dump and shedding sand with water. After the final absorption of water to the bottom should lay the slices of rubberoid, in order to prevent departure in the sand of moisture from the concrete mix;
- installation of pipes in wells with a margin at a height of at least 10 cm. Leveling pipes in terms of level and fixing them in wells with wooden bars. With the close occurrence of groundwater pipes, it is necessary to lift with bitumen mastic to the soil level for waterproofing;

- then the base of the pipe by 40-50 cm is poured a thoroughly mixed concrete-gravel mixture (1 part of the cement and 2 parts of sand diluted with water to the state of the liquid dough are connected to 2 parts of small gravel). Immediately after the fill, the pipe is lifted to a height of 15-20 cm and leave in such a position until the cement is completely frozen. This is necessary to create a base opposing the pushing when the soil begged;
- after pouring the concrete, it is necessary to water the pipe with the outer side of the rubberoid and flood with a well sand with a phased spray and the rambling;
- fittings are placed inside the pipes, after which the remaining part of the pipe is poured;
- after the final pouring of the concrete - after 2-3 weeks - continue construction work. It is necessary to add that it will be worthwhile to make waterproofing the foundation by polymer or bitumen solutions.

According to the same scheme, it is possible to mount with your own hands of a column foundation from plastic pipes. Video and photos will help to navigate in the subtleties of the workflow, as a whole, simple.
Foundation columnar
Scarlet is a system of randbalkas and strapping beams. It hardly fixes the foundation, excluding its offset in the horizontal plane or overturning the entire design. If there is a frame, the load from the structure is distributed evenly on all established column supports, as a result of which the stability and resistance to the destruction increases.
To facilitate the understanding of the process, the necessary work is set out in stages.

Preparation and installation of supports:
- in any case, the initial stage of preparation for the construction of the foundation is the arrangement of the construction site. After removing garbage, etc. On the perimeter of the future foundation, the turf and the upper layer of the soil are removed;
- for support, it is necessary to dull pits with a depth of 20 cm greater than the level of soil freezing. The width of the pit must be 40 cm larger than the width of the wall, since each side is added 20 cm for formwork and strut;
- at the bottom of each pit, they make spilled water and a good rammed pillow from a sandy-rubble mixture with a height of 20 cm. The pillow is littered with rubberoid or polyethylene, so that the moisture from the concrete is filled into the pit did not go into the ground;

- formwork boxes are collected from 20 mm thick boards;
- formwork installed in the pit is recommended to thoroughly moistened to prevent absorbing moisture from cement mortar and facilitate removal;
- after installing the formwork in the pit, the framework of reinforcement is placed. The frame is assembled separately, from a rod 10-14 mm in diameter. The length of the rods is selected in such a way that the pouring of the concrete their ends sticking over the ground level by 30-40 cm;
- the concrete mixture is poured continuously, layers of 20-30 cm, moving the vibrator to avoid the formation of air bubbles;
- the formwork is removed after 3-4 days, the surface of the supports is treated with any suitable waterproofing mixture and the remaining part of the pockets fall asleep with sand. Before filling, it is also possible to insulate the foundation by extruded polystyrene foam.

Woodworking device:
There are two options for mounting woodwork: laying it on earth or raising over its surface. The advantage of the second way is to eliminate the impact of the forces of the transmission:

Cost of work on the device of a column foundation
The total cost of a column foundation is consisted of the amount of the value of the materials and the cost of work itself. In most cases, it is significantly lower than the cost of other types of foundations, since almost all types of columnar foundations can be built. Video and photos, instructions and manuals found on the Internet, too, are teasel or free.
The calculation of the value of most types of columnar foundation is possible to make independently with the help of special online calculators or programs. Many of them are easy enough on the Internet, free and possess an intuitive interface.
The base of the building under construction should be durable and reliable, to withstand all weight loads from building structures of the house, engineering equipment, household goods and snow precipitation on the roof. The foundation base should remain stable with possible primers, not collapse in case of freezing or lifting groundwater. However, it is not always appropriate to build a heavy and powerful reinforced concrete base. In certain cases, the issue of reliability can be solved using the supporting structure of the column-belt type.
This is a kind of combined bolt bonded foundation that combines at the same time technical solutions taken for pile and tape monolithic systems.
Due to this, such bases can be erected on weak unstable soils with a high level of groundwater and a large depth of freezing for single-storey residential buildings and household buildings. Tape pillars can be built for wooden and frame buildings that do not have heavy reinforced concrete floors and stone walls.
Brief Description Design
Constructively, a columnar-ribbon foundation consists of several supporting stone pillars, which relieves the reinforced concrete fine-breastned woodcut, which takes all the weight loads of the building. Reinforced concrete pillars fill in place are most often used as a pillaby supports.
In general, the columnar base combines the following main elements:
- reinforced concrete pillars, construction and the number of which is determined by the calculation;
- reinforcing carcass, filled with concrete;
- overhead ribbon design of brick or blocks;
- internal vertical supports for the perception of the load for walls and partitions.
With a careful consideration, it can be noted that the idea of \u200b\u200btechnology was taken from multi-storey urban buildings with cellars and semi-oats, where the pile field of the project configuration is clogged, and then the binding ribbon woodcarrel is mounted for creating a single support.

Advantages and disadvantages of columnar constructions
The construction of the foundation of this type is less laborious than in the case of any other type of monolithic reinforced concrete, and also requires smaller construction materials. Having design decisions in the hands, for the performance of work, there will be no need for professional building knowledge and greater experience. Even newcomer can cope with this, having one or two helpers with him.
The constructive advantages of the columnar bases include:
- good protection against vibrational influences and possible primers;
- a special design of support pillars, which increases strength and stability;
- the use of mixed species of materials when mounting the frame;
- increased thermal insulation properties due to the absence of contact of the underground overlap with soil;
- the possibility of exercising in areas with a complex relief without pre-planning;
- reduction of earthworks;
- the ability to make a column ribbon foundation with your own hands.
In addition to explicit advantages, such supporting structures have the disadvantages that can be somewhat difficult to organize and carry out work:
- complex engineering calculation, taking into account the combination of the characteristics of the soil and the total weight load;
- possible difference in cross section of support in height and perimeter of the building;
- the practical impossibility of determining the effect of soil bunchiness requiring the stock of strength;
- the inability to make a basement.
Therefore, the implementation of the calculations and the development of the project is recommended to entrust professionals that determine the necessary data and decide with the minimum possible but necessary margin of strength and reliability.
Choosing material support pillars
The reliability of the foundation design largely depends on the correct selection of material of the support racks. At this stage of construction, do not keep saving. If at the moment the purchase of inexpensive materials will save certain money, then in the future for repair and correction of marriage will have to spend very significant amounts.
For the construction of a tape-ribbon foundation with a monolithic slab overlap can be used:
- wood;
- dog stone;
- full-length red brick;
- aerated concrete, foam blocks, slag concrete or concrete blocks;
- asbestos-cement, concrete, plastic or metal pipes;
- concrete poles;
- printed and burbilling files of factory manufacture.
Each material has its own characteristics about which is described below.
Wood
The main reason for the low popularity of wooden foundations is their short-life. Even additional processing for protection against moisture, rotting and insects increases the service life for a while. However, wooden beams can be used for the developer of light household and household buildings elevated above the ground.
Dog stone
Fought well-known builders material that was widely used to build foundation structures. Differs great strength and durability. However, for its masonry, high qualifying magazine skills are required for fitting individual stones to each other. Therefore, reliable pillars from the boob stone will be able to post only a professional builder.
 Types of columnar foundations: a. brick pillar on a boboch base; b. a solid brick pillar; in. Brick pillar on a concrete base; G. Wooden burned chair (oak or pine); d. metallic rack; e. Buktill.
 Brick and blocks
For the underground part of the foundation design, only clinker or full-length clay brick of high grades can be used. In the columnar-ribbon foundations of bricks and blocks lay the above-ground part of the woodwok located on concrete monolith.
Given the hygroscopicity of these materials, a surface coating device is required by bitumen waterproofing in several layers.
Pipe
The use of asbestos-cement, concrete, plastic or metal pipes is suitable as a non-removable formwork, inside which the reinforcement frame is installed and concrete is poured. As a result, you can quickly get high-quality reinforced concrete pillars. Metal materials need to provide waterproofing coating to protect against corrosion.

Concrete pillars
Vertical pillars of reinforced concrete pillars are made on the place after drilling wells or digging them. The designs are flooded inside the removable or non-removable formwork after installing the reinforcement frame. In addition, individual pillars or piles of factory manufacture can be bought. They are installed at points with the highest weight load and then tied with painter.
Printed and burbilling pillars
They are purchased ready in the building materials market. Installation is made using special scoring techniques directly on the installation site. Structurally is hollow reinforced concrete supports, inside which metal frame is installed and concrete is poured. Sharing the columns of both structures are allowed.
Technological principles of construction
The whole process of building the foundation must be carried out in stages, in the following order:
- installation or installation of support pillars;
- device of reinforced concrete monolithic screed, metallic or wood woodwork;
- brick or block masonry.
Such a separation is based on the possibility of continuous production of work at each of these stages.
Installation of support pillars
Calculation of section, quantity, placement places and depth of the pillaby support. When choosing a type of design, it is recommended to take a low-profiled monolithic ribbon painted on the columns to a depth of about 500 mm.
This allows you to more evenly distribute the weight load from the building to the foundation. The frame raised above the earth should be done in the presence of complex terrain, in the places of strong grounding of the soil and the districts of permafrost.

It is necessary to plunge the sole at 300-400 mm below the possible point of the fruit of the soil, taken from the SNiP "Climatology". According to the results of engineering calculations, depending on the selected material and the characteristics of the area, the technical characteristics of the poles are determined, such as diameters, location and installation method.
 Reinforcing frameworks must contain at least 4 vertical strings.
 The technological process of installation of supports can also be divided into several consecutive works, including:
- removal of existing vegetation and leveling of the working platform;
- markup of the location of the column and the clockwork configuration;
- drilling or digging wells;
- the device of a sand pillow and a pouring of concrete only to the height of the lower support plate;
- ensuring waterproofing the elements;
- installing a non-removable formwork or burbilling columns;
- assembly and installation of reinforcement frames;
- pouring concrete into a formwork or column.
When pouring, the obligatory expansion of the sole must be taken into account, twice as large as the diameter of the column itself, but not less than 400 mm. Therefore, the fill of concrete should be performed in two stages. Initially, the sole should be pouring, wait 2-3 days, and only after that it starts to install the formwork for the support device.
Installation of woodwoman
With the fine-breed design, the framework of the frame from the very beginning this stage of work should be started with trench rolls. The depth of the concrete tape should be more than 400 mm.
After that, the formwork of the project configuration is set. To do this, you can use boards or full-time shields of factory manufacture. Inside the collected formwork, it is necessary to lay a layer of polyethylene film or runner. This will ensure the tightness of the structure and will exclude the leakage of water from the cement mixture.
Metal frameworks are made according to the calculated design scheme for mounting the horizontal reinforcing belt. All reinforcement structures are stacked inside the formwork and are connected to a bundle with vertical strings of pillars, which should be at a height of at least 300 mm.
 Proper and erroneous device.
 Next, you can proceed to the pouring of concrete. The mixture should be laid in layers, while working in such a way that laying a concrete mix was performed per day. The above-ground part of the foundation can be made of bricks or blocks. This will ensure the presence of a horizontal waterproofing layer between the underground part and the supporting ribbon layer of the construction of walls of the house.
The formwork can be removed a few days after the concrete gains strength.
At the final stage, all the outer surfaces of the frame are covered with three layers or use rolled materials. Protection of stone structures from the impact of moisture at each stage of the work will provide the possibility of long-term operation and will prevent the formation of destruction.
 Mounting sequence.
 Foundation Guide
Summarize. Step-by-step instructions on the installation of a columnar belt foundation with their own hands provides for the following steps:
- Clearing the platform from trees, bushes and low vegetation. Aligning the surface of the soil if necessary.
- Marking of places of installation of pillars and contours of woodwork on the axes of the house. The pillars must be at all corners of the building and at a distance of no more than 2.0 meters from each other.
- For brick, butt or square monolithic columns, you need to dig a shurten. For the intimidated cylindrical formwork in the form of pipes or hollow poles, drill wells. The depth of the shurts or wells is 300 mm deeper than the possible friction point.
- Pour and tumble in open cavities sandy or crushed stone-sand pillow. Install formwork elements or burbilling poles. Raise them over the bottom of the shurt on the height of the support pillow.
- After that, set, laying onto the bottom, the reinforcement frame of the columns and pour concrete to the height of the support pillow. Wash 2-3 days to set the concrete mix.
- Pour the concrete into the formwork of the columns and compact it well with the help of a vibration tool. After hardening the concrete mix with a removable formwork or a stone masonry to handle the surfaces of the triple layer of bituminous coating isolation. This work is allowed after mounting the framework.
- Mounting formwork in such a way that the reinforcement of the reinforcement is in its inner space. Next, proceed to assembling the formwork for the horizontal belt. After installing it, close the walls and bottom of the polyethylene film or rubberoid.
- Collect the reinforcement frame in accordance with the project and put it inside the formwork design. After that, tie or cook a horizontal belt with vertical strings of pillars.
- Concrete in the formwork scratching is flooded in one day. The laying of concrete is made in layers and a mixture seal to remove air bubbles.
- If a stone masonry is used in the design of the foundation frame, then on the surface of the concrete, 2 layers of the rubberoid should be seized to create a waterproofing layer. Every 3-5 rows brickwork must be reinforced with a metal mesh with a cell no more than 100x100 mm from a wire of 5-6 mm.
5-7 days after the end of the work, you can proceed to the installation of walls or frame design of the building. In the case of the raised framework, the woodwork, all the sand, which is under the building, must be removed. In this case, the house will remain resting only on the columns.

Video on the topic
The choice of the type of foundation for the cottage or country house will first depend on which material is planned to build the building itself. For example, relatively light buildings can be installed on a bar foundation. In addition, this type of foundation is suitable for unstable swampy, peat, sandy or converged soils, as well as for regions with deep freezing.
A columnar foundation of barks can be equipped for a relatively short time. Moreover, most often for this it will not be necessary to help any special or heavy equipment.
A columnar foundation is most often arranged for various wooden buildings - it can be a frame cottage, a gazebo, a bath, as well as household buildings, such as a barn or chicken coop.
It is not particularly recommended to raise brick or stone buildings on a column foundation, since if they are too heavy, the supports can give drawdown, which will lead to the deformity of the walls, and in the future - and to their destruction. However, there are special technologies that are used in industrial and residential construction, most often in regions with eternal Merzlot. But it is in these cases that special approaches and specialized techniques are required - under this article there will be no such ways.
There are several types of support and columnar foundations. They are united by the design of the device, and the material used for the structure is different.
- The monolithic reinforced concrete construction can be called the most durable and reliable for the construction of residential buildings from all existing columnar foundations.

This option has the highest compressive strength and stretching (definitely, with proper reinforcement), which is very important when building the structure on unstable, movable soils.
On the monolithic foundation, it is permissible to build not only single-storey, but also two-storey wooden houses.
- Brick column foundation can be called the most common From this type of base. It should be noted that such a design, built from high-quality materials, can even serve a hundred and more years - this is evidence of the Nogus-medical monuments of antiquity in Russian and European cities. True, to achieve such a "long-life" for this construction, you need to choose an exclusively burned brick and only excellent quality.

Brick columns can be solid either with a bold concrete "core"
This type of foundation is also suitable for building a house from one ÷ two floors while maintaining construction on dense soils. The brick supports of the foundation usually give the size in the cross section of at least 400 × 400 mm.
- The foundation from blocks that can be made from different materials has the same qualities as a brick design. However, its reliability and durability will depend on the quality and type of material used.

Column foundation from blocks - akin to brick species
The most durable capable of withstanding heavy loads, concrete blocks are considered.
- A columnar foundation made of boob stone is not recommended to be installed on the slopes of the hilly area, as it will have low stability on movable soils.
- The bout-concrete foundation is reliable enough, and can be made in different ways - this is a concrete, mixed with boot, orderly laying or, poured into a well, isolated from bout.

Concrete, falling between the stones, reliably fastens them, making the design of a durable, capable of withstanding high loads.
- Small wooden buildings can be installed on the foundation, the supports of which are also made of wood that has passed special processing. Houses that stood dozens and hundreds of years, prove that a properly treated tree will be able to serve quite a long time.

Currently, still, due to the fact that more reliable materials for the foundation have appeared, the tree for this purpose is used more and less. Although for the attached to the house, such as a veranda or terrace, wooden poles having a diameter of 150 ÷ \u200b\u200b200 mm are suitable, as it is impossible. However, it is impossible to forget that in order for them to stand for a long time, before entering them, they are treated with antiseptic impregnations and covered with waterproofing materials - bitumen mastic, which is fixed in the runneroid.

- A columnar foundation can be made of asbestos pipes of a small diameter (about 150 mm) if a lightweight wooden building will be built on it, and 250 ÷ 400 mm, if the construction is planned sufficiently massive. Asbestos pipes of large diameters can be a kind of finished formwork for filling the support piles concrete and strengthen them with reinforcing rods.

- Another option of a column foundation can be a design made of metal piles, which are screwed into the ground. This method of arrangement of the foundation for the building is good because the pile of all unstable interlayers passes, and then screwed into the dense strata of the soil - this is exactly what allows her to secure there. On a similar foundation, you can build a wooden structure installed on both even and at a fairly crossed area of \u200b\u200bthe territory.
Varieties of columnal foundations in degree bloanity
In addition to varieties of basic manufacturing material, the columnar foundations are divided according to the degree of "immersion" them in the ground relative to the level of land. So, exist small breeding and outlined base varieties. The choice of this criteria directly depends on the characteristics of the soil on the site.

Small breeding OPTION PR is called if there is small-blooded, sandy and rock soils with deep passage of groundwater. Stumps of foundations of this type are set to a depth of only 650 ÷ 700 mm. This should be quite enough, as the soils in which they are immersed, are little susceptible to displacement.

Piles of a columnarly blurred foundation go to the thickness of the soil at 1500 — 2000 mm and even more. They are usually used in areas with a deep freezing of soil, which exceeds 400 ÷ 500 mm. In addition, such foundations are more suitable for unstable moving soils.
The distance between the foundation pillars is usually from 1000 to 2000 mm.
Basic Stated Foundation
A columnar foundation has a rather simple general construct.

- At the base of the columns, 100 ÷ 200 mm sand layer is stacked. The sand is a kind of drainage that helps to get out of the foundations of the foundation moisture, which can accumulate in the ground.
- Further, on top of the pillow, a concrete solution is stacked, which forms a monolithic plate, an average of 400 ÷ 500 mm thick.
- The next one goes, in fact, the first support itself, which is required to strengthen the reinforcement rods - this will need to be done even if the columns are erected from stone or bricks. The second important action with the support is to ensure its reliable waterproofing.
- The columns should be raised to one level above the surface of the Earth, and on top of them are arranged as a strip or other binding support belt, which evenly distributes the load on the entire structure of the column foundation.

Scarlet is often made from a wooden bar having a size in a section of 150 × 200 or 200 × 200 mm. For wooden houses or household buildings, the woodlock can be both a mortgage crown for future walls.
In addition, on a column foundation, manufactured from any of mentioned above Materials, in addition to wooden, reinforced concrete woodcase can be arranged. It is made by structures in which the reinforcement structure is placed, and then poured concrete.

Scarlet can practically "lie" on the ground, becoming similar to the ribbon foundation
Scarlet can raise the lower edge of the building at a height of up to 800 ÷ 900 mm above the soil, and can be located just 300 ÷ 350 mm from the ground or even "lie" on the surface of the soil. In the latter case, from the side it will look exactly the same as the belt form of the foundation.
- The minus of the column design that lifts the house over the ground is at a considerable height (about 1000 ÷ 1500 mm), is that under the structure it is impossible to arrange a full-fledged basement. However, sometimes household owners find a way out of the situation, establishing a bandwarming between the foundation poles that should not be linked by the reinforcement structure with the foundation. A clogging is an intersive wall, folded from plates or bricks, and sometimes just incomparable from a tree.

Meetwave wall - Baby
When it is installed, it is necessary to provide normal ventilation in the underground space, which will not allow you to mock the walls and floors in the house. Therefore, in the built-up, the ventilation holes are made, which are "dressing" in lattices or deflectors, in order to protect the semi-basement from the penetration of small animals, insect birds, etc.
- A columnar foundation is often used in areas where the usual phenomenon is considered the high risk of flooding during river spills. In this case, the pillars can go to the ground to a depth of 2000-2500 mm, and rise above it in the same height. Given all the peculiarities of the area, it will not be possible under such a house, and it does not make sense to organize the basement, so there is no need to build a bandwidth.
Calculation of columnar foundation

The first stage is always, even before workaccording toreproduce the installation site The foundation is planning, that is, the compilation of the relevant project. This question necessarily requires a professional approach. A special organization engaged in architectural calculations should be drawn to the design of the project, taking into account the entire spectrum of the source data - from local climate and soil features and to specific wishes of the customer.
Of course, the basic data to start the design will be the total area of \u200b\u200bthe structure and its overall calculation mass, the place of the intended construction. A geodetic survey and binding an object on the ground are carried out. In addition, the designers will take in:
- Specific features of soils at the construction site of the building.
- The location of the ground aquifers and the depth of their location.
- The border of the freezing of the soil, the degree of its swelling during freezing.
- The number of floors in the erection and its total height.
- The main materials from which are expected to maintain the building of the building, including the types of overlaps and the type of roofing.
- All possible additional loads that will have to have each key point of the foundation.
As a result, the number and accurate placement of support pillars, the material of their manufacturing, installation technology, the depth of the bookmark, the height of the protrusion above the level of the earth, the highlight of the frame and, possibly, other necessary data is.
Calculations, of course, you can try to spend and independently using the specialized networks available online calculatorswhich are designed to determine the parameters of the foundations of the most different type.

However, it is not worth relying on such possibilities, since such software can still not consider all the specifics of a particular place of construction. And here are experts working in this region, they certainly know the features of this area and will certainly make calculations more accurately. Moreover, with professionally prepared project documentation will be much easier to carry out all the procedures for the design and coordination of other registration and permits for the construction.

Video: Calculation and construction of a pile foundation for a frame house
Preparatory Earthworks
- The first of the events preceding the installation of the foundation design is the preparation of the site and the markup under its installation.

For this, on the basis of the compiled project, at the points of the binding, at first it is accurately limited to a plot intended for the construction of the building. This place is immediately noted with the help of the twine and pegs. MoreoverStretch, as a rule, two parallel threads that determine immediately and the width of the future foundation. Corners at the intersection of threads should be straight - it is best to control it with a geodesic tool. If this is not, it is necessary to very carefully check the perpendicularity and parallelism of the lines. Be sure to compare the length of the diagonals of rectangles - if it is the same, then the markup is performed qualitatively.
- Further, from the planned area, the fertile layer of soil with a thickness of 150 ÷ \u200b\u200b200 mm is removed.
- Then the installation sites of the foundation are determined - also in strict accordance with the dimensions specified in the project documentation.
- After that, using a manual or mechanical car, the holes are drilled at the outlined points. The diameter of the selected wells is also specified in the project - it can be from 150 to 400 mm.

- Subject to the penetration of these holes to a depth of 800 ÷ 1000 mm, the fixation of their walls is most likely not required.

- In the event that the foundation will be overwhelmed more, it will be necessary to do for the walls of the backup, to avoid sweeping soil.
- If the pillars are square in the section, the bored holes are expanded with a bayonet shovel to the desired size.
- Further, the bottom of the digs of the wells falls asleep sand, a layer of 100 ÷ 200 mm, moisturizes and is well tumped.
- A 150 ÷ \u200b\u200b170 mm of a coarse concrete solution is poured onto a sandy pillow, which will become a reliable base for pillars and will not allow moisture from the solution to be absorbed into the sand and soil.
How to install columnar supports
When the wells-wells are prepared under the poles, you can start the manufacture of the supports themselves.
Under the conditions of individual construction, not all of the design items mentioned at the beginning are applied equally often. It is worth considering the most accessible in self-installation and due to the most popular of them.
Picks-supports from bricks or blocks
- A formwork from the rubberoid is installed in the prepared pit, it can be arranged both in a round and square pittal. The same ruberoid will also submit the role of the waterproofer.
- Further, the reinforcement structure is lowered into the pit, which should be height in the ground with the surface of the soil.
- Then, a concrete solution is poured into the pit, made of cement and gravel or gravel of the middle fraction.
- The pit is completely filled, the solution is aligned from above and left to stick and strengthened. This will take at least 8 ÷ 10 days.
- Then, the converged concrete column is the rubberoid in two or three layers - it will be a reliable waterproofing for brick or block masonry.

- From above brickwork is carried out to the desired height of the support. The column can be laid out by a well - at the same time its inner hollow part will be subsequently filled with concrete. Another option is when the pillar is completely complicated from the brick.
In the same way, pillars and from small concrete blocks are erected.
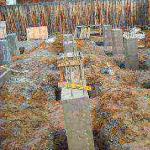
Monolithic foundation reinforced concrete poles
This option made by concrete pillars is made somewhat different.
- The rubberoid is installed in the round prepared hole, rolled in two layers into the pipe. The height of the pipe should correspond to the level to which the foundation should be raised.

- For the stability of this peculiar rubberoid formwork, it can be installed in a light metal mesh, also rolled into the pipe. Stability is needed so that concrete, after filling it into it, it was possible to shake and release air bubbles in the solution during the mixing process.
- The resulting formwork establishes the reinforcement structure, and then the concrete, made of gravel and cement, is poured on top of it.

- If a concrete belt will be arched on top of the concrete pillars, the reinforcement rods should be higher than the foundation pillars. This is necessary for the ligament of the reinforcement parts of the pillars and the spokesperson reinforcement system.

- Before arranging a formwork for a concrete belt, supports from above must be treated with bitumen mastic, which will create additional waterproofing for columns.
Video: Filling of concrete pillars of the pile foundation
Asbesto-cement pillars
A columnar foundation can also be arranged from asbestos-cement pipes that are installed on a concrete pillow, as well as in the previous case, where rubberoid was used. However, the process of fill the columns here has its own characteristics.
- For stability at the bottom of the pipe, which will be in the pit, make two holes. Through them, the metallic rod segment is carried out, and then the asbestos tube is installed in the pit and fall asleep around the crushed so that it closes the fittings sticking on both sides. The pipe is attached perfectly vertical position.
- Then the concrete solution on one third is poured into the tube formwork.
- After that, it is necessary in the middle of the pipe, into a flooded unpleasant solution, set the reinforcement - it can be one or more rods.
- Next, the solution is poured to the top of the pipe and levels on top.

- Around the pipe you need to immediately fill the entire space by the Suglink or the soil, which was selected from the pit. All this backstage is thoroughly tamped.
Metal piles
Metal piles can be screwed into the arranged hole, which is made by a manual brown, but piles leave much deeper into the ground. For such a foundation, do not have to prepare a pit, performing sandy filling and pouring a concrete pillow in it.

Sometimes piles are screwed directly into the surface of the soil, without pre-digging well. But in any case, alone with piles do not cope, you will need at least one assistant.

- When screwing up piles, constant control over their verticality is conducted. Piles are screwed to before the design depth.

- After all piles will be screwed, they must be filled

- For the convenience of performing this operation in the pipe, a special funnel is installed, and the solution is poured into the cavity, until the pipe is filled with the top.
- After filling, the concrete must be captured and hardening.
- On top of finished piles, metal platforms can be welded, which is fixed by wooden woodwok.

- Another embodiment can become metal jumpers - they become a belt binding piles into a single design. They can be welded not only from top of the installed columns, but also at the ground level, which gives the additional rigidity and reliability of the whole foundation.

Another option - a metal profile welded between supports
Miscable piles are convenient for use crossed The location where you have to withdraw the foundation pillars for one height, since they can be corrected - lift a little or lower below.
Video: Foundation on screw metal stamps
Scarlet Sv Ayin Fondament
Scarlet or jumper, which is stacked on top of the pillars of the foundation, is both a binding element for the entire design and a reliable support for the construction of walls.
On any of the types of a column foundation, we can lay wooden jumpers made of a powerful bar, reinforced concrete design or painted metal rolled steel.
The jumpers are fixed in different ways, depending on the material of the manufacture of columns and heads itself.
- Wooden jumpers are most often fixed with anchors.
- The metal belt (channel, 2-way or corner) is attached or welding seams, or powerful bolts.
- Reinforced concrete belt fromfastened with the help of general reinforcement, which has already been previously installed in the column and passing through the woodlock, where it is twisted with the wire with the reinforcement grid of the jumper itself.

So conclusion. FROMthe thick foundation is much economted in the device than the monolithic or tape. In addition, it can be quite united by its own. If it is decided to make a light extension to the house, for example, verandas or terraces, then the bases are better and easier than the foundation columnally, just not to find.
How to make a column foundation with your own hands? Yes, it's very simple: read our instructions, buy the necessary materials and tools and proceed to execute the plan. Believe me, this work will take not so much time and strength even in an inexperienced builder. After all, the base on the pillars is the easiest and most affordable option of the foundation from all existing.
Choose materials and reserves tools
Here it is necessary to immediately decide, from which the vertical support element will be made (pillar), painter (horizontal part of the foundation) and the base (slouching design). The cheapest and simple version of the set of materials that allow you to collect a column foundation with your own hands, it looks like this: cast vertical elements (pillars) cast from concrete; Screwdrived from Bruus Screek; Collected on the basis of shields base.
Concrete casting will make even a beginner builder - it is not a brick or block masonry. Scarlet from the bar will be simultaneously and the lower crown of the house - it turns out good savings on materials. The shield base is going faster than the ribbon and does not need its own foundation, win again and money again. As a result, for construction we will need:
- Sand, crushed stone, cement, old boards and polyethylene - on the poles.
- A timing segment of 20x20 centimeters, anchor bolts and rubberoids - for woodwork.
- Flat slate and foam 5-10 centimeters thick - on the base.
If you plan to collect a pillaby foundation with your own hands, you will need the next set of tools:
- Shovel and car - for earthworks.
- Haves, hammer nails - for formwork and woodwork.
- A trough or an old bath and a bucket for a concrete solution.
- Bulgarian and drill with a winning drill - for the base.
How to create a column foundation - step-by-step instructions
His foundation on the pillars can build each. This technology is even available to those people who did not hold the construction tools in their hands literally until yesterday. BUTyou need to start with earthworks. First, place the contours of the future building, projecting the base of the house on the ground. In the corners we drive the pegs and stretch between them the twine. Select the layer of fertile soil (10-15 centimeters) and export it to the site. Some wizards ignore this step, but to scatter good soil is unreasonable. It will come in handy for the flower, and for the beds.
Usually we are dealing with rectangles, so at the end of the markup you can check the diagonal - they must be the same. Secondly, placing places for columns, distributing them along the twine in a step of 2 meters and marking milestones (by pegs). The distance between the columns should be approximately the same, so the 2-meter segments are better measled from opposite angles, acting alternately. As a result, a small plot (less than 2 meters) will be in the middle of the segment.

Thirdly, we tear the "mines" under the pillars. The cross section of such a shurf should be at least 30x30 centimeters (one and a half times the cross section of the woodworking frame). The depth of the excavation under the base support must correspond to the level of primerization of the soil - 80-120 centimeters. Therefore, to facilitate the meal of the soil, the cross section of the shurfe increases to the dimensions of 50x50 centimeters. Fourth, we form "pillows" from sand and gravel. The bottom of the shurt is covered with a 20-centimeter layer of sand and a 20-centimeter gravel layer.
Fifth, we put in the shurt to the cylinder the rubberoid segment, laying the sheet along the walls of the deepening in the soil - it will work like vertical waterproofing. On this earthworks end.
Upon completion of work on the ground, proceed to the floculation of formwork. Initially, we take old boards, hill or another cheap lumber and cut them on 50-centimeter segments. Locate from these segments of shields of 55 centimeters wide, placing the boards along, and the bars - across. Next, make up the cube shields, scoring nails into ends, through the sides. And the nails do not need to nail along the hat - it is better to score on the length and bend to the side. Find the inner part of the cube old polyethylene film. It seals the slots between the boards. In the final we argue the boarding cubes over the surnames of the foundation. When finished with a formwork, proceed to kneading a concrete solution:
- Paws to the bathroom or trough two buckets of cement 400th brand.
- We pour out the same 6 buckets of sifted sand and stirred it "on dry" with cement in a homogeneous mass.
- Fill in the bathroom 1.5-2 buckets of water and begin to wash the wet solution.
- We add to the solution of 6 buckets of rubble, thoroughly mixing the mass after each portion.
As a result, a homogeneous mass should be obtained, in which dry inclusions are not contained. Moreover, when they are injected manually, we recommend to stick to such proportions, since it is very difficult to prepare a larger solution. And completes our guide to the fill stage of the foundation. Take the reinforcement rod and rub it into pieces of the bottom of the shurt to the top cutting of the formwork. We drive into the bottom of the recess in the ground four such rods. Draw from the bath prepared solution and pour into the pit and a formwork, filling it to the top.

Immersed in a liquid solution anchor bolt with a hook at the end, checking the vertical position of the threaded part using a level. We repeat this operation until the full filling of each formwork. And forget about the foundation for two weeks. The height of the poles with the first angular reference element using a transparent garden hose filled with water. We apply one end of the hose by placing it at the top of the already flooded support, and fill the second formwork to the water level in the second end.
How to make scarlet and base?
The column concrete foundation will drop 60-70 percent of construction strength for 10-14 days. After that, it is possible to begin the arrangement of the frame - the beam system stacked on the pillars foundation, and the base is a fencing design, which is erected around the perimeter of the base. Scarlet is done like this: we take the timing of 20x20 centimeters and put it on the cluttered pillars, projecting the location of the anchor bolts to the framework of the frame. Remove the timber and drill holes for anchors.
In the corners, we make a sample, retreating from the end of the bar a 20-centimeter distance and cutting 10 centimeters of its thickness. We put on the upper part of the concrete carrier element Ruberoid - it will work as an insulator, a protective bar from moisture. We raise the bar and ride it on the anchors, not shifting the insulating layer. We attract the bar to the supports nuts, turning them on each anchor by 2-4 turns. The first timber will be filled with a sample, the second is a sample down. As a result, it will be a reliable pairing, enhanced anchor tie.

For the construction of the base, you will have to do the following: we apply a sheet of a flat slate to adjacent supports and cut into the level of the top of the scarlet. Drills holes in slate and support, drowning on 2 centimeters. Fresh leaf anchor bolts. We glue to the inside of the sheet of foam, using the mounting foam. Fix the insulation of the soil underfilling, excluding the likelihood of the waste of foam from slate. We repeat this operation throughout the perimeter.
Work on the construction of the base is to begin only after the completion of the construction of the walls, but before the flooring. If you start earlier, the risk of damage to the fragile slate will increase due to careless impact. The base made in a similar way to protect the base from snow drifts and heat loss in winter. Moreover, the shield base will cost cheaper than brick even at the stage of the material. And the insufficient presentation of such a design can be corrected due to the external finish.
And whether it is worth starting - the advantages and disadvantages of the foundations on the pillars
In this article, we showed how to easily build a column foundation with your own hands - step-by-step instructions of this process proves this fact to any skeptics. However, not a single word was said about the lack of such supporting design. It's time to correct this situation.
By minuses of the base design of the base include the following:
- Weak resistance to the beaches of the soil. In winter, the "climb" posts from the ground, and very unevenly. Because of this, the carrier wall of the house can be deformed.
- Insufficient support area of \u200b\u200bthe foundation and, as a result, a weak bearing capacity of the base of the house. That is why only wooden or one-floor poles are put on the poles.
However, these shortcomings are balanced by quite tangible advantages:
- Simplicity of the establishment of the foundation - such a design can be made together by spending 2-3 days on this work.
- Cheap construction. Poles will cost cheaper piles, ribbons and stoves. This is really the most inexpensive version of the foundation.
As a result, if the soil is not frightened to you (it is eliminated due to sandy-gravel intiments) and attracts the cheapness of materials and work, then you can build a column foundation. However, if you have at least some doubts about the beating or depth of the soil freezing, then it is better to consult with designers or familiar builders. Perhaps a column version of the base will not fit your home or plot.
Now frame houses are created in almost all climatic belts. Due to the minor weight of the structure, when it is erected, the base is used with a small bearing capacity. Simple option is a column foundation.
Advantages and possible drawbacks of the foundation of a column type
The columnar base is a simplified variety of pile foundation. The design is a network of supports mounted around the perimeter of the walls and in places of the greatest loads. The maximum step between the supports is 2.5 m. All poles are combined with painter with painter (horizontal strapping). The columnar foundations for framework buildings are used 2 types: monolithic concrete (made by fill in support) and prefabricated (constructed from finished blocks or stones). Despite the fact that the design is constructed without solid fill with the concrete of the entire perimeter, such foundations have a number of advantages that make the design of reliable and durable.
Column foundation for frame house
Advantages of a columnar foundation:
- Costs cheaper than ribbon analogs;
- Can be made independently;
- Quickly erected;
- It does not need hard technique for his structure;
- Easily repaired;
- Poles can be installed at any time of the year, including the winter.
The disadvantages of the structure include a large amount of handmade (if there are no drilling equipment) and the need for additional insulation of the floors, as the frame structure is practically hanging in the air.
Preparation for the manufacture
At the preparatory stage, it is necessary to find out the size of the future structure, the load on the foundation of the superior structures and the supporting ability of the soil. Before the construction of a skeleton house, you can independently perform a study of the soil. To do this, you need to drill a few holes on the plot. The depth of the well - below 50 cm soles of the foundation. In this way, the type of soil and the absence of aquifer is determined.
Suitability:
- Rock - soils with a high content of stone or gravel, differ in a strong base, well hold the load, do not collect water.
- Large sands are a strong base with low bunchiness.
- Smallopean - poorly suitable for construction, as they differ in high bunchiness. They collect water in the upper layers and actually act on the foundation.
Calculations of the depth and number of columns
The columnar bases are blown (for water-saturated and clay soils) and low-rise (for rock and sandy soils with low groundwater occurrence). The height of the blurred foundation depends on the average depth of the soil freezing in your area. The sole of such a base should be located below this level by 30-50 cm. Before starting work, you should calculate the load of the house, for this it is summed by the weight of the walls, overlap, roofing and mass of the foundation.
If the slope slope is more than 60 degrees, the snow load is equal to 0.
To determine the weight of the reinforced concrete basement, it is necessary to multiply its volume of reinforced concrete (2500 kg / m³). For calculation of the weight of the same pillar, the following formula is used: V \u003d 3.14 * G² * h. V is the volume of the pillar, G is the pole radius, H is the pillar height. All values \u200b\u200bare indicated in meters. The resulting value must be multiplied by the number of columns, and we will have a total foundation.
The bearing capacity of different soils (in kg / cm²):
If the load on the soil exceeds the carrying capacity of the soil on the plot, you need to increase the number of columns.
Selection of material and calculation of quantity
For a column foundation, different materials are used:
- A tree is a very short-lived material, even when processing protective compositions will serve no more than 20 years.
- Stone poles - usually erected from boot or granite stones. Different durability and reliability. The disadvantage is massiveness and complexity when building.
- Monolithic concrete poles.
The number from the table must be multiplied by the post length (in meters) and the number of supports.
The valve for a columnar base is used corrugated, class A, with a diameter of 10-12 mm. Metal bars are needed the same length as supports. For a pole with a diameter of 10-14 mm, you will need 4 bar of reinforcement. They are placed at a distance of 10 cm from each other and tied out half meter with a smooth and thinner reinforcement with a diameter of 6 mm. Thus, it will take 8 m thick and 1.2 m thin reinforcement for a two-meter pillar. The figures obtained are multiplied by the amount of supports and we obtain the method necessary for the bondage base of the reinforcement.
Required tools
Before starting construction, it is necessary to prepare the following tools:
- Concrete mixer;
- Shovel;
- Roulette;
- Level;
- Nails and selflessness;
- A hammer;
- Cord;
- Pegs;
- Manual drill;
- Master OK;
- Pipes or formwork boards.
Step-by-step instructions for creating the foundation with your own hands
Marking site
Before starting work, markup is made - pegs are drunk in the corners of the future building and the cord is stretched. At this stage, you must check the diagonals. They must be the same. Further, the garbage and vegetable layer are removed throughout the area and the posts of installation of the poles are scheduled.
Digging holes and waterproofing
Drilling holes for columnar foundation
For the foundation from monolithic concrete or asbestos pipes, it is convenient to use Motobur. Pits can be both straight and expansion at the bottom. The wider sole will increase the carrying ability of the base and increase its resistance to bent. Now it is necessary to make waterproofing the foundation. To do this, each pit should be omitted with a pipeline or polyethylene tube. The upper edges of the waterproofing must be pressed to the soil with stones or sprinkle the earth.
Creating formwork and installation of fittings
Opaalbook of pipes for a column foundation
The finished wells establish the formwork of their asbestos or metal pipes (beam) or boards (removable). Then the armature with a diameter of 10-14 mm (at least 4 pcs) is inserted into each pit (at least 4 pcs.) Horizontal jumpers are made from thinner rods 6 mm.
Installing fittings in wells for pillars
All pillars must be installed in such a way that the woodlock turns out strictly horizontal. To do this, the initial point is selected and then with the help of the level, the height of each support is noted.
Pouring concrete and woodlock
Installing formwork for Ruralk
Concrete M200 can be used to build columns foundations. The fill is made by layers of 20-30 cm, each site is thoroughly tamped. Concrete is poured without interruptions to prevent the formation of transverse seams. After drying, the column is installed as Rollock. For its manufacture on top of the poles, a horizontal formwork is installed on the entire perimeter of the foundation. Then the framework of the reinforcement is stacked and concrete is poured. Standard sizes screeching 2.5-2.5 m (width and height).
Video: Filling a column foundation concrete
A columnar foundation is one of the most simple and economical solutions for frame structures, which is quite accomplishing independently. Use our advice and successful you work!
Articles on the topic